DIY projects have become increasingly popular among homeowners, and for good reason. Taking on a DIY project can be both fulfilling and therapeutic, offering a sense of accomplishment that store-bought solutions simply can’t provide. One of the most versatile and impactful DIY projects is building a custom floating shelf. Not only does this project allow you to add functional storage and aesthetic appeal to any room, but it also gives you the freedom to tailor the shelf to your exact needs and style preferences. In this guide, we’ll walk you through the process of creating a floating shelf from scratch, along with insights on why embracing DIY can be so rewarding.

Why DIY Projects Are Good for Homeowners
Taking on DIY projects at home is more than just a way to save money—it’s a creative outlet that brings a host of benefits. First, DIY projects like building a custom shelf allow homeowners to personalize their space in ways that mass-produced items can’t match. The act of planning, crafting, and finishing a project by yourself or with loved ones adds a personal touch to your home, making it feel truly yours.
Additionally, DIY projects can be incredibly therapeutic. The process of working with your hands, focusing on detailed tasks, and watching your vision come to life can be a form of mindfulness, helping to relieve stress and boost your mood. There’s something deeply satisfying about seeing the tangible results of your effort—a beautiful, functional piece that you built with your own hands. Beyond the emotional benefits, DIY projects also foster valuable skills and self-reliance, empowering homeowners to tackle future projects with confidence.
Materials and Preparation: Getting Started
Before diving into the construction of your floating shelf, gather all the necessary materials. You’ll need wood (preferably a durable hardwood like oak, pine, or maple), screws, metal brackets, sandpaper, a drill, saw, level, and your choice of paint or stain. Selecting the right type of wood is crucial not only for the aesthetic but also for the shelf’s durability. Hardwoods are generally more robust and can hold heavier items, making them an excellent choice for this project.
Planning Your Shelf
Start by planning the dimensions of your shelf based on where you want to place it and what you intend to display. Floating shelves are ideal for displaying decorative items, books, or even kitchen essentials, so consider the weight and size of these items when deciding on the shelf’s length, width, and depth. Measuring accurately is key—use a measuring tape to determine the perfect size that fits the available space without overwhelming the room.
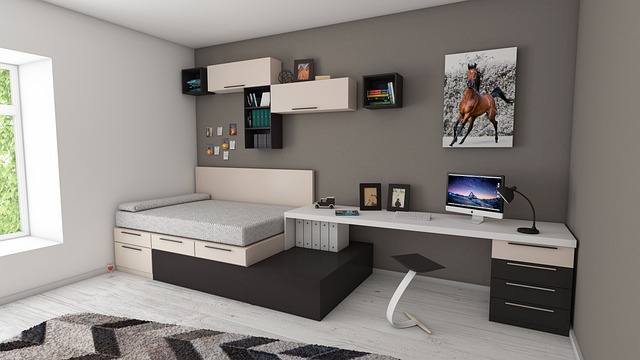
Step-by-Step Guide: Building Your Floating Shelf
Step 1: Measure and Cut the Wood
Once you have your measurements, use a saw to cut the wood to your desired length and width. If you’re not comfortable using a saw, most hardware stores offer cutting services. After cutting, sand the edges and surfaces of the wood thoroughly to remove any splinters and create a smooth finish. Sanding is an important step, as it prepares the wood for painting or staining and ensures a polished final look.
Step 2: Assemble the Shelf with Brackets
With your wood prepared, it’s time to attach the brackets that will give your shelf its “floating” appearance. Position the brackets on the underside of the wood, making sure they are evenly spaced. Use a drill to secure the brackets with screws, ensuring that they are tightly fastened. The placement of the brackets will largely determine the stability of your shelf, so take care to align them properly.
Step 3: Paint or Stain the Shelf
Now that your shelf is assembled, it’s time to apply your chosen finish. Painting or staining not only enhances the wood’s appearance but also protects it from wear and tear. For a modern, sleek look, consider painting your shelf in a bold color that contrasts with your walls. If you prefer a natural aesthetic, opt for a stain that highlights the wood’s grain. Apply the paint or stain with even strokes, allowing each coat to dry completely before adding another. A clear protective finish can be added for extra durability, especially if the shelf will hold heavy or frequently moved items.
Step 4: Install the Shelf on the Wall
Installing your shelf is the final and most rewarding step. Begin by marking the wall where you want the shelf to be mounted. Use a level to ensure the shelf will sit straight once installed. Drill pilot holes into the wall at the marked spots, and use wall anchors if you’re not drilling into studs. Anchors provide additional support, which is particularly important if the shelf will hold heavier objects. Once the brackets are aligned with the wall marks, secure the shelf by drilling screws into the anchors or studs.
The Fulfillment of DIY: More Than Just a Shelf
Completing a DIY project like building a floating shelf brings a sense of pride and accomplishment that goes beyond the finished product. It’s about the journey of creating something with your own hands, learning new skills, and overcoming challenges along the way. Whether you’re a seasoned DIY enthusiast or a beginner taking on your first project, the experience can be incredibly rewarding.
In addition to personal fulfillment, DIY projects can also positively impact your home’s value. Custom features, like built-in shelves or unique decor items, can make your home stand out to potential buyers and reflect a well-maintained property. Even if selling your home isn’t on the horizon, these projects contribute to a more enjoyable and personalized living space.
Enjoy Your New Space
Once your floating shelf is securely installed, take a moment to appreciate your hard work. Whether it’s filled with books, plants, or treasured mementos, the shelf is not just a functional addition to your home but a reflection of your creativity and effort. And who knows? This might be just the beginning of your DIY journey. There are countless other projects waiting for you to explore, each with its own set of rewards and learning opportunities. So grab your tools, unleash your creativity, and transform your space—one project at a time.
