Revamping your bathroom can seem like a daunting task, but it doesn’t have to involve a major renovation. DIY peel-and-stick tiles offer a simple, cost-effective way to transform your space without the hassle of traditional tiling methods. This weekend project is perfect for homeowners looking to add a touch of style and personality to their bathroom with minimal effort. Beyond just updating your space, taking on DIY projects can be deeply satisfying, allowing you to express your creativity while enhancing your home. In this guide, we’ll walk you through the steps to install peel-and-stick tiles in your bathroom and explore the broader benefits of tackling DIY projects.
The Appeal of DIY: Creativity, Fulfillment, and Personalization
One of the greatest appeals of DIY projects is the ability to personalize your home to reflect your unique style and preferences. Instead of settling for cookie-cutter designs, you can tailor every aspect of a project to suit your vision. DIY projects, like installing peel-and-stick tiles, are not only fulfilling but also offer a creative outlet that can reduce stress and improve your mental well-being. The hands-on nature of these projects provides a break from daily routines, allowing you to focus on a tangible task with visible results.
Moreover, DIY projects can boost your confidence and skills as a homeowner. Completing a project on your own can be incredibly empowering, demonstrating that you have the ability to improve your living space without always relying on professionals. This sense of accomplishment is a key aspect of why DIY continues to resonate with so many people.
Materials and Preparation: Getting Ready for Your Tile Project
Before you begin, gather the necessary materials: peel-and-stick tiles, a measuring tape, utility knife, level, pencil, and cleaning supplies. Choosing the right tiles is crucial, as they need to be durable, water-resistant, and designed specifically for bathroom use. With an array of designs available—from classic subway tiles to vibrant mosaics—you can easily find an option that suits your style.
Preparing the Surface
The success of your tiling project hinges on proper preparation. Start by thoroughly cleaning the surface where the tiles will be installed. Remove any dirt, soap scum, or residues, as these can prevent the tiles from adhering properly. Use a mild detergent and warm water, and allow the surface to dry completely. For a smooth finish, ensure the surface is even; if there are any imperfections or uneven spots, consider sanding them down or applying a thin layer of spackle.
Step-by-Step Guide: Installing Peel-and-Stick Tiles
Step 1: Measure and Plan Your Layout
Accurate measurements are essential for a successful tile installation. Measure the height and width of the area to determine the amount of tile needed. Planning your layout is crucial; it helps avoid awkward cuts and ensures a balanced, symmetrical appearance. Use a pencil and level to draw guide lines on the surface, which will help keep your tiles straight and aligned as you work.
Step 2: Start Tiling from the Bottom
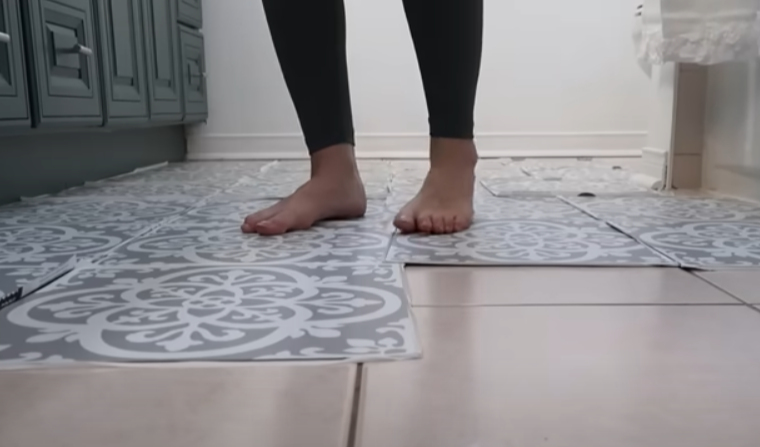
Begin by peeling the backing off the first tile and pressing it firmly onto the surface, starting from the bottom center and working your way outwards. Applying the first tile correctly sets the foundation for the rest of the installation. Press firmly on all corners and edges to ensure the tile sticks properly. Continue to apply tiles row by row, using your guide lines to keep everything level.
Step 3: Cutting Tiles for Edges and Outlets
As you reach the edges, corners, or areas around outlets, you’ll need to cut tiles to fit. Use a utility knife and straight edge to score and snap the tiles, making precise cuts to fit around obstacles. This step can be a bit time-consuming, but careful measurement and cutting will result in a clean, professional finish. For outlets, remember to turn off the power and remove the cover plates before cutting tiles to fit around them.
Step 4: Finishing Touches and Sealing Edges
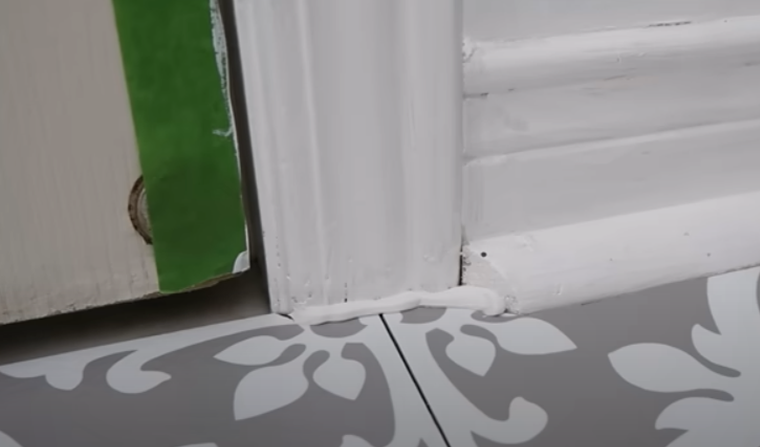
Once all tiles are in place, give the entire surface area a gentle press to ensure each tile is securely adhered. For a polished look, you can seal the edges with caulk, especially around sinks or tubs where moisture exposure is high. This not only adds a finishing touch but also helps prevent water from seeping behind the tiles.
The Benefits of DIY Home Improvements
Taking on DIY projects like this not only enhances your living space but also provides a sense of pride and accomplishment. Revamping your bathroom with peel-and-stick tiles can significantly elevate its appearance, making it look fresh and updated without the need for extensive renovations. Additionally, DIY projects can add value to your home, as potential buyers often appreciate thoughtful upgrades that reflect care and attention to detail.
Beyond the practical benefits, the act of doing something yourself fosters a connection to your home. It transforms the way you perceive your space, turning it from just a place you live into a true reflection of your style and efforts. Plus, working on home improvement projects can be a fun, engaging way to spend your free time, either alone or with family.
Enjoy Your Updated Bathroom
After completing your peel-and-stick tile installation, step back and admire your handiwork. Not only have you updated your bathroom, but you’ve also taken the time to learn new skills and make a space truly your own. The sense of fulfillment from seeing the finished product is one of the many reasons homeowners continue to embrace DIY. So why stop here? With your newfound confidence and skills, the next project is just around the corner. Embrace the satisfaction of DIY and continue transforming your home, one project at a time.
