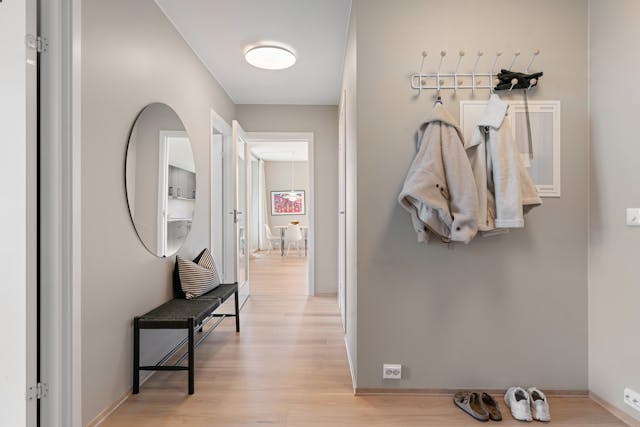
The entryway is the first impression your home gives to visitors, and it’s often the place where shoes pile up in a mess, especially in busy households. Whether you’re looking to organize the space or just want a stylish new feature, a DIY shoe storage bench can provide both function and form. Not only will it keep things tidy, but it’ll also offer a convenient spot to sit while putting on shoes before heading out. Let’s dive into this weekend project that will transform your entryway.
Article Sponsor: Parking Lot Striping Mesa
Materials You’ll Need
Before we begin, gather these materials:
- Plywood or reclaimed wood (for a rustic look)
- 2×4 boards for support
- Wood screws or nails
- Drill and wood glue
- Sandpaper
- Paint, stain, or varnish
- Cushion (optional for seating)
Step 1: Measure and Plan Your Design
First things first: measure the space where your bench will go. Whether you have a large hallway or a cozy entryway, the size will determine the proportions of your bench. Think about how many pairs of shoes you want it to store, and whether you’d prefer to have open cubbies, sliding drawers, or a simple shelf underneath.
Sketch out a basic plan, factoring in these measurements. A common size for a shoe storage bench is about 48 inches long, 18 inches deep, and 20 inches high, but you can adjust it according to your space and needs.
Step 2: Cut and Prepare Your Wood
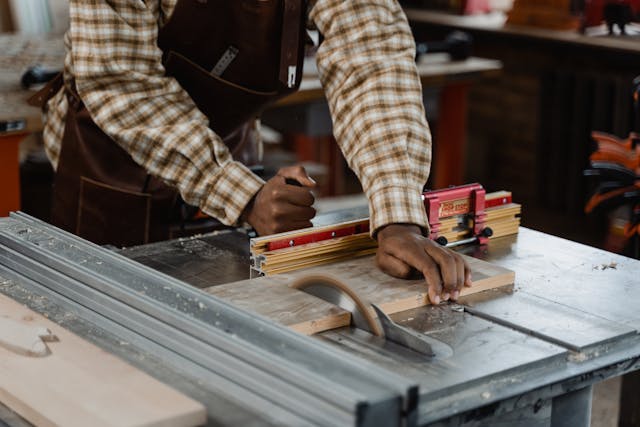
Once you’ve got your plan in place, it’s time to cut your wood. If you’re using plywood or reclaimed wood, cut the following pieces:
- Two sides (matching the height and depth of your bench)
- One top (this will be the seat)
- One bottom (for the base of the storage area)
- A back panel (optional, but adds a cleaner look)
Sand down all your cut pieces with sandpaper to ensure smooth edges and surfaces, avoiding any splinters or rough spots.
Step 3: Assemble the Frame
Using your 2x4s, create the basic frame of the bench. These will act as the support structure, ensuring your bench can handle the weight of people sitting on it. Once your frame is in place, attach the sides, top, and bottom panels using wood screws and wood glue. Be sure everything is level and square as you go.
Pro Tip: If you’re not feeling confident with screws, you can use corner brackets to secure the structure even further.
Step 4: Create the Shoe Storage
For the storage section, you can get creative. For a simple design, cut additional pieces of wood to create cubbies under the bench where shoes can easily slide in. If you’re feeling more ambitious, install sliding drawers or even wicker baskets for a more polished look.
Tip: Consider leaving room for taller boots on one side and making smaller cubbies for sneakers and sandals on the other. Customization is the beauty of DIY!
Step 5: Paint, Stain, or Varnish
Now that your bench is assembled, it’s time to add some personality. If you’re going for a modern look, a coat of fresh paint in a bold color can make your bench a statement piece. If you prefer a more natural or rustic look, staining the wood to bring out its natural grain will add warmth and charm.
Once you’ve applied your paint or stain, finish it off with a protective varnish to keep the wood in good condition, especially if you expect the bench to endure a lot of wear and tear.
Step 6: Add a Cushion (Optional)
For added comfort, top your bench with a cushion. You can either purchase a pre-made bench cushion or make one yourself by wrapping foam in fabric and securing it with a staple gun. This little touch will not only make the bench cozier but also give it a polished, store-bought look.
Step 7: Style and Organize
Once your bench is complete and in place, it’s time to add the finishing touches. Organize your shoes neatly in their new cubbies or drawers, and add a few decorative items on top to tie it into your home’s décor. A few throw pillows, a small plant, or even a basket for keys and mail can make the space functional and inviting.
Tips for Success
- Measure Twice, Cut Once: This old adage is especially true for DIY projects. Double-check your measurements before cutting any wood to avoid mistakes.
- Get Creative with Storage: If your household has a lot of shoes, consider dividing the storage space into individual sections for each family member, or using baskets or bins for easy organization.
- Personalize It: Don’t be afraid to add personal flair to your bench. Whether it’s a unique paint color, custom drawer pulls, or a cushioned seat that matches your home’s interior, the possibilities are endless.
Why Build a DIY Shoe Storage Bench?
Beyond its practical benefits, building a custom shoe storage bench allows you to create a piece that perfectly fits your space and style. Unlike store-bought options, a DIY project gives you full control over materials, colors, and size. Plus, it’s an affordable solution to an organizational problem that most households face.
The best part? You get the satisfaction of knowing that you built it yourself. A shoe storage bench isn’t just a functional piece—it’s a handcrafted addition to your home that can transform a cluttered entryway into a tidy, welcoming space.
This DIY shoe storage bench is a fun weekend project that adds style, organization, and function to your home. Whether you’re an experienced DIYer or just getting started, this project is an excellent way to flex your creativity and make your home work better for you. So why not take a break from the clutter and give your entryway the upgrade it deserves?
Thank you for visiting our blog. We hope you are finding some good ideas. If you have any of your own ideas to share, please contact us today. We love to hear your ideas. We also ask that you visit our sponsor, Mesa Parking Lot Striping.
