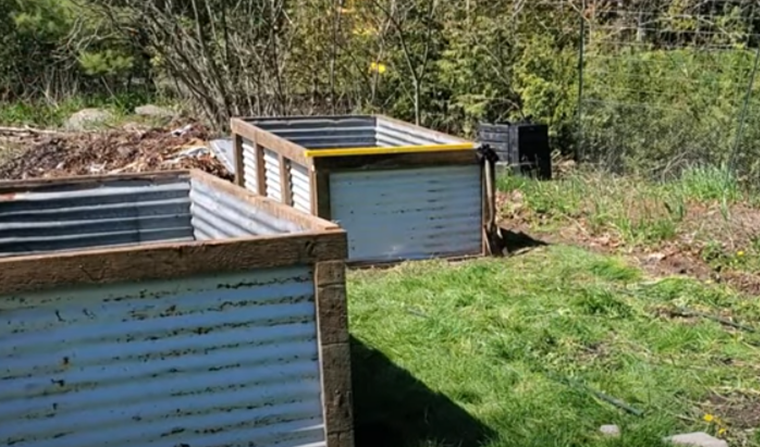
Creating a beautiful and functional garden space can significantly enhance the appeal of your home, and one of the best ways to achieve this is by building a raised garden bed. Using reclaimed wood for this project not only adds a rustic charm but also promotes sustainability by reusing materials that might otherwise go to waste. Raised garden beds offer numerous benefits, including improved soil quality, better drainage, and easier access for planting and harvesting. In this guide, we’ll explore the steps to build a raised garden bed from reclaimed wood and discuss why taking on DIY projects can be a deeply rewarding experience.
The Rewards of DIY Gardening Projects
DIY gardening projects like building a raised garden bed are more than just practical—they’re a way to connect with nature, reduce stress, and foster a sense of accomplishment. Gardening itself has been shown to have therapeutic benefits, offering a calming effect and a chance to slow down in our fast-paced lives. When you build your own garden bed, you’re not just creating a space for plants; you’re crafting a personal sanctuary.
Moreover, DIY projects help homeowners develop valuable skills and gain a greater understanding of their environment. By engaging in projects like this, you not only improve your home’s functionality and aesthetics but also contribute positively to your mental and physical well-being. There’s something truly gratifying about seeing a project through from start to finish, especially when it results in fresh produce or beautiful blooms in your backyard.
Materials and Planning: What You’ll Need
To get started, gather your materials: reclaimed wood, screws, a drill, measuring tape, saw, soil, and your choice of plants or seeds. Reclaimed wood can often be sourced from old pallets, barns, or construction sites, offering a cost-effective and environmentally friendly option. When choosing wood, ensure it is untreated and free from chemicals that could leach into your garden soil. Look for pieces that are sturdy and in good condition, as they will form the structure of your bed.
Planning Your Garden Bed
Select a location in your yard that receives ample sunlight, as most garden plants need at least six hours of direct light each day. The size of your garden bed can vary depending on your space and gardening goals, but a common size is 4 feet wide by 8 feet long—large enough to accommodate a variety of plants but small enough to reach across for easy weeding and harvesting. Use a measuring tape to mark out the area, making sure it is level to ensure even water distribution.
Step-by-Step Guide: Building Your Raised Garden Bed
Step 1: Cutting and Preparing the Wood
With your measurements in hand, use a saw to cut the reclaimed wood to the desired lengths for the sides of your garden bed. A typical bed has four sides: two long and two short. Sand any rough edges to prevent splinters and create a smoother finish. This step also helps to ensure the pieces fit together more snugly when assembling the frame.
Step 2: Assembling the Garden Bed Frame
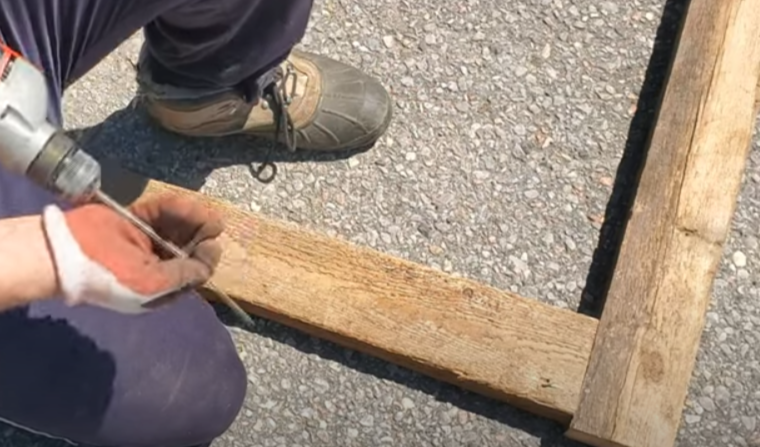
Lay the wood pieces on a flat surface and arrange them into a rectangular frame. Use a drill and screws to attach the corners, securing them tightly to form a sturdy box. It’s important to check that the frame is level at this stage; a lopsided garden bed can cause uneven water distribution, which can affect plant growth. Adjust as necessary, ensuring that all corners are square and all sides are even.
Step 3: Positioning and Filling the Bed
Once the frame is assembled, move it to your chosen location. If the ground is uneven, you may need to dig slightly or add soil to level the base. Once positioned, fill the bed with a mix of high-quality soil and compost. Layering the soil is beneficial; start with a base of organic matter such as leaves or straw, followed by nutrient-rich compost, and top it off with a layer of quality garden soil. This creates a rich environment that encourages healthy root growth and retains moisture.
Step 4: Planting Your Garden
With the bed filled, it’s time to plant. Choose plants or seeds that are appropriate for your climate and the season. Consider a mix of vegetables, herbs, and flowers for a diverse and vibrant garden. When planting, be mindful of spacing—overcrowding can hinder growth and reduce yields. Follow the instructions on seed packets or plant labels for the best results, and water the newly planted bed thoroughly.
The Impact of DIY: Building Confidence and Connection
Building a raised garden bed is more than just constructing a box and filling it with soil; it’s about creating a living, breathing part of your home that will grow and evolve over time. This connection to your space can make your home feel more personalized and inviting. Moreover, the act of growing your own food or flowers fosters a deeper connection to nature and a greater appreciation for the cycles of life.
DIY projects like this one also boost confidence. Each step—from measuring and cutting the wood to seeing the first sprouts emerge—reinforces your ability to create something from scratch. These skills are transferable to countless other areas of home improvement and can inspire you to take on even more ambitious projects in the future.
Enjoying the Fruits of Your Labor
Once your raised garden bed is complete, take pride in what you’ve accomplished. Not only have you created a beautiful addition to your garden, but you’ve also contributed to your home’s sustainability by using reclaimed materials. As your plants grow and thrive, you’ll enjoy fresh produce and flowers that are the direct result of your effort and care. This project is a reminder of the value of DIY: it’s not just about saving money or avoiding store-bought items—it’s about the joy of creating, the satisfaction of nurturing, and the fulfillment of transforming your space with your own two hands.
